I had bought in a supply of the special vacuum machine bags from Culinary Innovations, which I found using a search engine - so when the metal sealer strip on my original Foodsaver and the replacement machine arrived with the same fault, I thought it best to look for a different make - and so went back to Culinary Innovations to see what they had to offer.
Their site had so much information on how and what to vacuum pack, it really impressed me.
I needed to talk to someone to make sure that the machine I was interested in would be the right one for my needs - so phoned and spoke to a very nice lady who was able to answer my questions. She also made a note that I wanted to receive it on Tuesday (yesterday) as I would be away over the weekend.
I simply ordered it on the internet - and true to her word it turned up yesterday. The package contained a proper instruction book, and lots of information about "do's and don'ts" on food packaging, which I did not know before. Brilliant. I also got 50 complimentary bags.
When the machine arrived it was a surprise to see the difference. Paying a little bit more was really worth every penny. It is so much more robust, and so much easier to use. I tried it out tonight and am thrilled to bits with it.
My photos do not do it justice so if you want to take a look here is the link:
http://www.culinaryinnovations.co.uk

In reality it is a lovely metallic blue colour.
I have packed the ratatouille that I made earlier today. I strained it and saved the 'juice' to use as a base for a pasta dish. I let the ratatouille cool, then chilled it in the fridge for an hour (at their recommendation).
Obviously you can not vacuum pack a liquid in a bag or it will be sucked up into the mechanism, hence my straining it off. It will produce more liquid when it is thawed and recooked.
This machine is so much quieter and easier to use. Using the complimentary bags, I put the now 'dry' mixture in a bag - lifted the lid, laid the bag up to the guide, and because I wanted to find out how strong the suction pump was (you had not control over it on my previous machine) I used the manual control. Easy peasy. Press manual, gently press the lid, and the suction begins then when the vacuum is at the degree you want it, you just press 'seal' and it does it, then when it is done it releases it and you open the lid.
(With the Foodsaver you have to keep your finger on the button whilst pressing hard down on the lid, when a green light flashes and goes off it is done. You have no control over the amount of suction so it can really flatten food - as you saw when I packaged my loaf in a previous post!)
So here is the finished produce - now packed into 9 bags and ready to freeze - great because you can clearly see what is in each bag and takes up less space in the freezer.
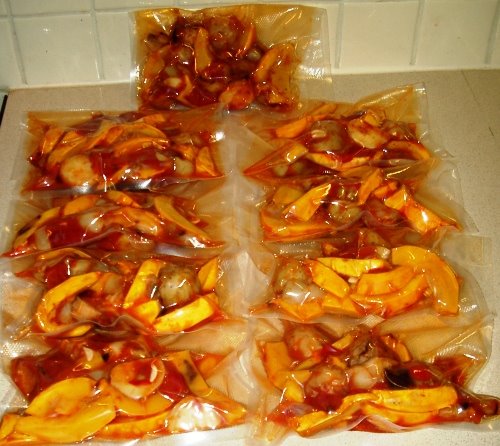
Over ten pounds of lovely colourful summer ratatouille - now that has got to cheer you up on a cold winter's day. (She says sweltering and washed out after a temperature of over 90f all day today.)
I also got out a lot of my bags of black currants and gooseberries that I open froze on trays, then put them in bags with a metal tie. Great to empty them into these nice strong bags and vacuum pack them too.
I remember that squashed flat loaf - and it really made me laugh - together with yourself and lots of your readers. I must say that your new machine does look great, and it is nice to be able to actually 'see' a 'normal' person using it - if you know what I mean, rather than just seeing an advert.
ReplyDeleteI have been thinking about getting a vacuum packer every since you mentioned it, and now that I have seen this one, I am off to look at the site.
Thanks for showing us how to used it AL
i bet this new machine will really suck the air out of a loaf of bread. probably a lot better than the old one did.lol, see i remembered laughting out loud.
ReplyDeleteSally, I don't know the technical differences, but it just works so much better. Not such a vicious vacuum so that it instantly crushes everthing to a pulp - you have more control over it, so you can just suck out enough air so extract the air and make a vacuum without pulping the food. I used it on automatic and it did the same thing when I when I packed the frozen berries - it seem to know when to stop so that they would not get crushed.
ReplyDeleteAlan - your technical comments have certainly made be understand why the Foodsaver failed.
ReplyDeleteThanks for your explantion on here - it makes more sense now.
I only featured your company's machine because it really is great, I was so amazed when I used it. Also your website really goes into so much detail - that I did not get or even know about with the foodsaver.
I really was very impressed, and still am, otherwise, believe me, you would not have got the blog space, let alone the photos.
I also forget to mention that there is a 2 year warranty with the machine - providing you don't ruin it by sucking up liquid. Hence all their meticulous instructions.
To vacuum liquids....put cooled liquid into a plastic food storage container. IE: one of those cheap throw away zip lock bowls with a lid. Fill the plastic storage bowl full of liquid and put the lid on it, then put the food storage bowl into your bags that vacuum seal and seal the vacuum bag. This will not get 100% of the air out of the bowl but will preserve your liquid good much better than just freezing it in a plastic container.
ReplyDeleteThanks for the tip 4th sister. I was thinking about putting it in a bag within a bag - but your idea is very much better. If I put it in the container and filled it up as high as I could before I sealed it, that would keep a lot of the air out, then I could put a bit of paper on top of it detailing what was inside before I vacuum pack the container. I will give it a whirl.
ReplyDeleteI've been using my vaccuum packing machine for some months now. I haven't used bags, but I like to vacuum pack things in canisters and in Mason jars (which are cheap). Foodsaver has a sealer attachement for mason jars, but it was hard to get a consistent hi-vacuum using it. But I got one of the larger canisters and perform the following proceedure: Put the food in the mason jar, put the lid on and screw down the top until it just starts to meet resistance, put the whole jar into the foodsaver canister, vacuum the canister, let the air into the canister, and then the jar will have sealed itself. That's great for storing all kinds of things that bugs like or that go bad in the presence of air. (My feta cheese now keeps forever that way.)
ReplyDelete